The Honeywell T5 Smart Thermostat is a programmable device designed to optimize home comfort and energy savings. It features geofencing technology and smart alerts for convenience. This manual provides essential installation steps, system compatibility, and setup guidance to ensure a seamless experience.
1.1. Overview of the Honeywell T5 Thermostat
The Honeywell T5 Smart Thermostat is a programmable device designed to optimize home comfort and energy savings. It features geofencing technology, which adjusts temperatures based on your location, and smart alerts for system notifications. Compatible with various heating and cooling systems, including conventional and heat pump setups, the T5 integrates seamlessly with smart home systems. Its user-friendly interface and Wi-Fi connectivity allow for remote control via the Honeywell Home app. The thermostat also supports voice control through smart speakers, enhancing convenience. With its sleek design and advanced features, the T5 is an ideal solution for modern home climate management.
1.2. Importance of the Installation Manual
The Honeywell T5 installation manual is crucial for ensuring a safe and successful setup. It provides detailed step-by-step instructions to avoid electrical hazards and compatibility issues. The manual outlines essential tools, system requirements, and troubleshooting tips, ensuring optimal performance. By following the guide, users can prevent common installation errors and guarantee proper functionality. It also highlights safety precautions, such as disconnecting power before starting, to protect both the user and the equipment. Adhering to the manual ensures the thermostat operates efficiently, delivering the expected energy savings and smart home integration benefits. Proper installation is key to unlocking its full potential.
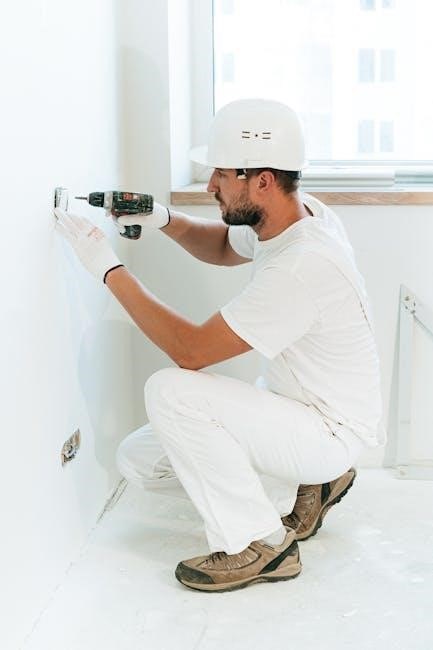
Tools and Materials Required
To install the Honeywell T5 Smart Thermostat, you’ll need basic tools like screwdrivers, a pencil, and a level. The box includes a mounting system and quick guide. A smartphone with the Resideo App and your WiFi password are also essential for setup. Ensure all materials are ready before starting the installation process.
2.1. List of Necessary Tools
To install the Honeywell T5 Smart Thermostat, you’ll need a few basic tools. These include a screwdriver for removing the old thermostat and securing the new one, a pencil for marking wire connections, and a level to ensure proper mounting. Additionally, a smartphone with the Resideo App is required for configuration and Wi-Fi setup. A ladder or step stool may also be helpful for reaching the installation area. Ensure all tools are readily available before starting the process to avoid delays. The quick install guide, included in the box, will also assist in completing the setup efficiently.
2.2. Materials Provided in the Box
The Honeywell T5 Smart Thermostat comes with essential materials to facilitate installation. Inside the box, you’ll find the thermostat unit itself, a mounting system (UWP), and a Quick Install Guide. Some models include a C-Wire Power Adapter, located under the thermostat, which may be required for proper functionality. Ensure all components are accounted for before starting the installation process. The materials provided are designed to simplify the setup and ensure compatibility with your home’s heating and cooling system. Refer to the guide for specific instructions on using these materials effectively.

System Compatibility
The Honeywell T5 Smart Thermostat is compatible with conventional 2 heat/2 cool systems and heat pumps with electric backup, ensuring versatility for various home setups.
3.1. Heating and Cooling System Types
The Honeywell T5 Smart Thermostat is compatible with a variety of heating and cooling systems, including conventional 2 heat/2 cool systems and heat pumps with electric backup. It also supports hot water heating and forced air systems, such as gas, oil, or electric configurations. This versatility ensures the thermostat can adapt to different home setups, providing efficient temperature control and energy savings. The T5 is designed to work seamlessly with most standard HVAC systems, making it a reliable choice for various residential applications. Its compatibility range ensures optimal performance across different heating and cooling technologies.
3.2. Compatibility with Smart Home Systems
The Honeywell T5 Smart Thermostat seamlessly integrates with popular smart home systems, enhancing its functionality and convenience. It is fully compatible with the Honeywell Home app, allowing users to control temperature settings remotely. Additionally, the T5 works with Amazon Alexa and Google Assistant, enabling voice control for effortless adjustments. Its geofencing technology also integrates with smart home systems to automatically adjust temperatures based on your location. This compatibility ensures the T5 can be part of a comprehensive smart home ecosystem, offering advanced features like energy monitoring and automated temperature adjustments for optimal comfort and efficiency.
Pre-Installation Steps
Before starting, ensure the power is turned off to avoid electrical shock or damage. Remove the old thermostat and photograph the wiring for reference.
4.1. Ensuring Power is Turned Off
Before installing the Honeywell T5 Smart Thermostat, it is crucial to disconnect the power supply to the existing system. This step prevents electrical shock or damage to the new thermostat. Locate the circuit breaker or switch controlling the heating and cooling system and turn it off. Verify that the system is completely powered down before proceeding. Failure to do so may result in personal injury or equipment damage. Always prioritize safety during installation to ensure a secure and successful setup.
4.2. Removing the Old Thermostat
Before removing the old thermostat, ensure the power to the system is turned off at the circuit breaker. Take photos of the existing wiring for reference during installation. Gently pull the old thermostat away from the wall to access the wires. Carefully disconnect the wires from their terminals, taking note of their positions. Remove any screws or clips holding the old thermostat in place. Once detached, set the old thermostat aside. If a C-wire adapter was used, ensure it is properly handled or replaced as needed. Proceed with caution to avoid damaging the wiring or surrounding area.

Installation Process
The installation involves mounting the thermostat, connecting wires, and finalizing setup. Use basic tools like screwdrivers and a level for accurate placement and secure connections.
5.1. Mounting the Thermostat
Mounting the Honeywell T5 Smart Thermostat begins with preparing the wall. Use the provided mounting system to ensure a level and secure installation. Locate the wall anchors and screws in the package. Drill pilot holes if necessary, then screw the anchors into the wall. Gently snap the thermostat onto the mounting plate, ensuring it clicks securely into place. Make sure the device is straight and level for proper function and aesthetic appeal. This step is crucial for the thermostat’s accuracy and performance.
5.2. Connecting the Wires
Connecting the wires is a critical step in the Honeywell T5 installation. Ensure the power to your HVAC system is turned off at the circuit breaker. Identify the wires from your existing system and match them to the corresponding terminals on the T5 thermostat. Use the wire labels provided in the box for clarity. If your system requires a C-wire, check if it’s included or if an adapter is needed. Tighten all connections securely to avoid loose wires, which can cause malfunctions. Refer to the wiring guide in the manual or app for specific configurations, especially for heat pumps or multi-stage systems.
5.3. Finalizing the Installation
After connecting the wires, turn the power back on at the circuit breaker and test the system to ensure it operates correctly. Check the thermostat’s display to confirm it powers on and responds to button inputs. Verify that all wires are securely connected and no terminals are loose. If your system requires a C-wire, ensure it’s properly connected or use the provided adapter. Use the Resideo App to complete the setup and configure your preferences. Finally, secure the thermostat to the wall using the provided mounting hardware and ensure it’s level for accurate temperature readings. Refer to the manual for troubleshooting any issues.
Setting Up the Thermostat
Configure your Honeywell T5 thermostat by launching the Resideo App, connecting to Wi-Fi, and setting your preferred temperature schedules. Follow in-app instructions for a smooth setup experience.
6.1. Initial Setup and Configuration
After installation, power on the Honeywell T5 thermostat and select your language. Open the Resideo App, create an account, and follow prompts to connect the thermostat to your Wi-Fi network. Once connected, configure basic settings like location, temperature preferences, and system type. The app will guide you through setting up geofencing and scheduling options. Ensure your Wi-Fi password is entered correctly for a stable connection. This initial setup ensures optimal performance and integration with smart home systems. Complete these steps carefully to maximize energy efficiency and comfort.
6.2. Connecting to Wi-Fi
To connect your Honeywell T5 thermostat to Wi-Fi, open the Resideo App and select your thermostat model. Choose your home’s Wi-Fi network from the list, enter your password, and confirm. The thermostat will automatically connect to the network. Ensure your router is nearby for a stable connection. If prompted, update the thermostat’s software during setup. Once connected, you’ll receive a confirmation message in the app. A strong Wi-Fi connection is essential for smart features like remote control and geofencing to function properly. Verify your network name and password for a successful setup.
6.3. Configuring Temperature Settings and Schedules
The Honeywell T5 allows you to configure temperature settings and schedules for optimal comfort and energy efficiency. Use the Honeywell Home app to set your preferred Home and Away temperatures, which can be adjusted manually or automated using geofencing. Create a custom schedule with specific temperature settings for different times of the day or week. The thermostat also offers an “Auto” mode that switches between heating and cooling based on your system’s needs. Ensure your settings are saved and review them periodically to adapt to seasonal changes or lifestyle adjustments. This feature helps balance energy savings with personalized comfort.
Smart Features
The Honeywell T5 offers advanced smart features like geofencing, smart alerts, and voice control integration, enhancing convenience and energy efficiency. Compatible with smart home systems, it ensures seamless connectivity and personalized comfort through the Honeywell Home app.
7.1. Geofencing Technology
The Honeywell T5 Smart Thermostat utilizes geofencing technology to detect your location and adjust temperatures accordingly. This feature automatically switches your system to energy-saving mode when you leave home and resumes your preferred settings as you approach. By delaying heating or cooling until you’re nearby, it optimizes energy usage without compromising comfort. The geofencing setup is easily configured through the Honeywell Home app, allowing you to customize the radius and temperature adjustments based on your lifestyle. This smart feature ensures your home is always comfortable while reducing energy costs during your absence.
7.2. Smart Alerts and Notifications
The Honeywell T5 Smart Thermostat offers smart alerts and notifications to keep you informed about your home’s comfort and energy usage. These alerts include temperature changes, system notifications, and maintenance reminders, such as when to replace the air filter. You’ll receive notifications directly on the thermostat’s display or through the Honeywell Home app, ensuring you stay connected to your home’s conditions. Additionally, the thermostat alerts you when it enters energy-saving mode or detects unusual system activity. This feature enhances energy efficiency and system reliability while providing peace of mind through real-time updates and customizable settings.
7.3; Voice Control Integration
The Honeywell T5 Smart Thermostat seamlessly integrates with popular virtual assistants, enabling voice control through Amazon Alexa and Google Assistant. This feature allows users to adjust temperatures, schedules, and settings hands-free, enhancing convenience and smart home integration. The thermostat works in tandem with these platforms, ensuring a smooth and intuitive experience. Voice commands simplify daily interactions, making it easier to manage home comfort without manual adjustments. This integration not only modernizes home automation but also complements the T5’s existing smart features, providing a comprehensive and user-friendly solution for precise temperature control and energy management.
Troubleshooting
Troubleshooting the Honeywell T5 involves diagnosing common issues like wiring problems, connectivity errors, or system incompatibilities. Refer to error codes for specific guidance and solutions to ensure proper functionality and restore operation efficiently.
8.1. Common Installation Issues
Common installation issues with the Honeywell T5 include incorrect wiring connections, lack of C-wire power, or incompatible system types. Users may also face connectivity problems during Wi-Fi setup or app configuration. Ensuring all wires are securely connected and the system meets compatibility requirements can resolve many of these issues. Refer to the manual or online support for detailed troubleshooting steps to address these common challenges effectively and ensure a smooth installation process.
8.2. Understanding Error Codes
The Honeywell T5 may display error codes during installation or operation, indicating specific issues. Common codes include E1 (temperature sensor issues), E2 (Wi-Fi connectivity problems), and E3 (system incompatibility). These codes help diagnose problems, such as incorrect wiring or power supply issues. Refer to the manual or Honeywell’s support site for detailed explanations and solutions. Addressing error codes promptly ensures optimal performance and prevents further complications. Always check wiring connections and power requirements before troubleshooting to resolve issues efficiently.

Maintenance Tips
Regularly clean the thermostat screen and ensure proper airflow. Check for software updates to maintain optimal performance. Verify all connections and replace air filters as needed.

9.1. Regular Maintenance Checks
Regular maintenance ensures the Honeywell T5 operates efficiently. Check the thermostat’s wiring for secure connections and inspect for dust or debris. Clean the device’s screen gently to maintain visibility. Verify that the air filter is clean or replace it as needed to prevent airflow issues. Additionally, ensure that the thermostat is properly mounted and level. Perform these checks every 3-6 months to maintain optimal functionality and energy efficiency. Address any issues promptly to avoid system malfunctions and ensure consistent home comfort. Regular maintenance also helps extend the product’s lifespan and preserves its smart features.
9.2. Updating Software
Regular software updates ensure your Honeywell T5 thermostat performs optimally. Updates are typically automatic through the Honeywell Home app, but manual checks are possible. To update, open the app, select your thermostat, and navigate to the settings menu. Choose “Update” if available. Ensure your thermostat is connected to Wi-Fi for seamless updates. Keeping the software current enhances features, fixes bugs, and improves performance. Always follow the app’s instructions carefully during the update process to avoid interruptions. Regular updates are crucial for maintaining the thermostat’s smart capabilities and ensuring compatibility with smart home systems. Update your device periodically for the best experience.
Compatibility with Smart Home Systems
The Honeywell T5 thermostat seamlessly integrates with the Honeywell Home app and third-party smart home systems, enhancing control and energy efficiency through advanced automation and voice command capabilities.
10.1. Honeywell Home App Integration
The Honeywell Home app allows seamless control of the T5 thermostat, enabling remote temperature adjustments, scheduling, and geofencing. It provides smart alerts for system status and energy usage, ensuring efficiency. The app is compatible with both iOS and Android devices, offering a user-friendly interface to manage home comfort. By integrating with the Honeywell Home ecosystem, the T5 thermostat enhances smart home automation, allowing voice control through compatible systems. This integration simplifies energy management and ensures optimal performance, making it easy to adjust settings from anywhere. The app is essential for unlocking the full potential of the T5 thermostat’s smart features.
10.2. Third-Party Smart Home Systems
The Honeywell T5 thermostat is compatible with various third-party smart home systems, enhancing its versatility. It integrates seamlessly with platforms like Apple HomeKit, Google Assistant, and Amazon Alexa, allowing voice control and centralized home management. Additionally, it works with popular smart hubs, ensuring compatibility with existing smart devices. This integration enables advanced automation scenarios, such as adjusting temperatures based on other smart home events. The T5’s compatibility with third-party systems expands its functionality, making it a flexible choice for diverse smart home setups and improving overall convenience for users.
The Honeywell T5 Smart Thermostat offers a perfect blend of simplicity and advanced smart technology, making it an ideal choice for homeowners seeking efficient temperature control. With its user-friendly interface, geofencing capabilities, and seamless integration with smart home systems, the T5 enhances comfort while saving energy. The comprehensive installation manual ensures a smooth setup process, even for those new to smart thermostats. By leveraging its smart features and compatibility with various platforms, the T5 proves to be a valuable addition to any home, providing long-term convenience and energy efficiency.